

TL;DR:
- Proper planning, permits, and sequencing are essential to avoid costly mistakes during a bathroom renovation. Following a strict order of work—from plumbing rough-in to final inspections—ensures code compliance and long-term durability. Investing in waterproofing, ventilation, and quality finishes will produce a healthy, attractive bathroom that adds value to your home.
Every bathroom renovation starts the same way: excitement, Pinterest boards, and a budget that feels generous. Then reality hits. A step by step bathroom renovation that skips permits triggers fines. Wrong sequencing means ripping out fresh tile to move a drain. A botched waterproofing job breeds mold behind walls for years. This guide walks you through every phase of the bathroom renovation process, from the first measurement to the final municipal inspection, so you finish on time, on budget, and with zero regrets.
Table of Contents
- Key takeaways
- Step by step bathroom renovation: planning and preparation
- Demolition and structural preparation
- Installation: plumbing, electrical, waterproofing, and fixtures
- Finishing touches and final inspections
- Common problems and how to avoid them
- My honest take on bathroom renovation management
- Ready to take the next step with Floor2you?
- FAQ
Key takeaways
| Point | Details |
|---|---|
| Plan before you touch a wall | Set your budget, pull permits, and finalize your floor plan before any demolition begins. |
| Sequencing protects your budget | Plumbing rough-in must precede tile; skipping this order causes expensive rework costing thousands. |
| Permits are not optional | Replacing a tub or moving a toilet triggers required permits in most jurisdictions. |
| Pass inspections on the first try | Waterproofing membrane height, exhaust fan sizing, and flange height are the top failure points. |
| Cure times are non-negotiable | Tiling over damp membranes or grout causes mold and tile failure within months. |
Step by step bathroom renovation: planning and preparation
You cannot overplan a bathroom renovation. What looks like wasted time up front is money saved during construction. Start by honestly assessing the bathroom you have: note the location of the toilet flange, the position of the shower drain, and where electrical circuits run. Moving any of these fundamentally changes your cost.
Setting a realistic budget
Bathroom remodel costs vary widely, but the numbers give you a useful anchor. The national median spend on bathroom renovations was $13,000 in 2024, with major remodels averaging $22,000. Add 15 to 20 percent as a contingency buffer before you commit to any contractor. Surprises inside walls, like outdated wiring or rusted supply lines, are the rule rather than the exception in older South Florida homes.
Understanding permits
This is where many homeowners get burned. Replacing a tub or moving a toilet triggers mandatory building, plumbing, and electrical permits in most jurisdictions. Many homeowners assume a simple fixture swap needs no paperwork. That assumption costs them at resale when unpermitted work surfaces during a home inspection. Contact your local building department early, ask specifically what your planned scope requires, and budget two to six months for planning and permitting before construction even begins.
Key preparation steps before demolition
- Measure and sketch a floor plan with fixture locations, drain positions, and window placement
- Choose all materials before ordering anything so lead times do not delay your schedule
- Confirm contractor licenses, insurance, and references before signing any agreement
- Decide which tasks are genuinely DIY-friendly (painting, hardware) versus trades that require licensed professionals (plumbing, electrical)
- Order materials with a 10 percent overage to cover cuts and breakage, particularly for tile
Pro Tip: Lock in your tile, vanity, and fixtures before demolition starts. Supply chain delays are still common, and waiting on a backordered item with no working bathroom is a painful lesson.
Here is a quick reference for typical material and scope costs to guide your planning:
| Item | Budget range | Notes |
|---|---|---|
| Basic tile installation | $800 to $2,500 | Varies by tile complexity and sq footage |
| Vanity and countertop | $500 to $3,000 | Custom units run significantly higher |
| Plumbing rough-in changes | $1,500 to $5,000 | Moving fixtures adds cost |
| Exhaust fan (code-compliant) | $150 to $600 installed | CFM sizing is critical for code |
| Permit fees | $200 to $1,500 | Varies by municipality |
Demolition and structural preparation
Demolition feels satisfying but punishes carelessness. Before you swing a pry bar, shut off the water supply at the main or dedicated shutoff, and kill the bathroom circuit at the breaker panel. Confirm both are off before cutting into walls.
The correct demolition order matters. Work from top to bottom and from fixtures outward to walls:
- Remove mirrors, accessories, and light fixtures first
- Disconnect and remove the toilet (plug the flange immediately with a rag to block sewer gases)
- Disconnect and remove the vanity, then the faucets and supply lines
- Remove the tub or shower surround
- Strip wall tile using a floor scraper and oscillating tool, working in sections
- Remove flooring down to the subfloor
- Pull drywall or cement board only in areas being rebuilt
Inspect the subfloor and wall framing as you go. Soft spots in the subfloor indicate water damage that must be addressed before anything is reinstalled. This is not optional. Building over a damaged subfloor voids any warranty and guarantees future failure.
Pro Tip: Photograph every wall cavity before closing them back up. Document where pipes and wires run so future repairs take minutes, not hours.
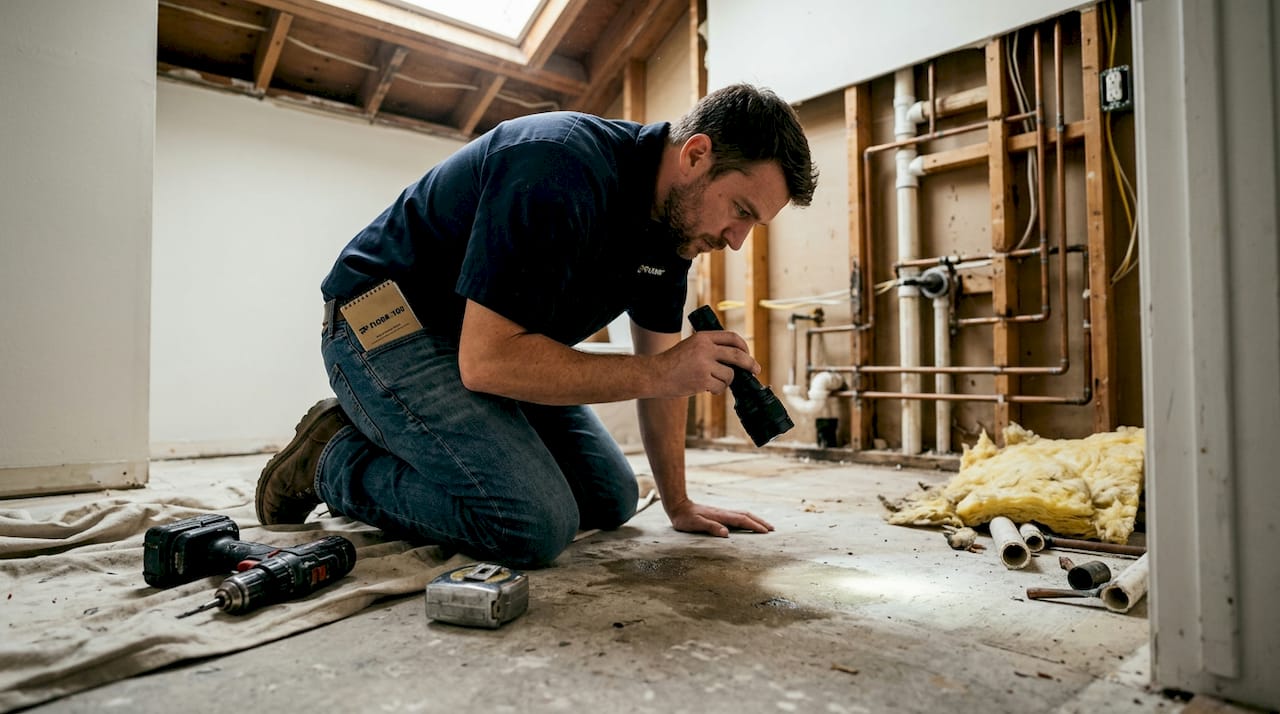
Schedule your rough-in inspection during this phase if your permit requires one. The re-inspection fee runs $75 to $250 per failed visit, so have everything exposed and correct before the inspector arrives. This is also when structural framing adjustments, like widening a doorway or relocating a wall, must happen.
Installation: plumbing, electrical, waterproofing, and fixtures
This is the most technically demanding phase. Sequencing errors here add three to four expensive line items to your project, and moving a drain after tile is installed can cost between $2,000 and $6,000. The correct installation sequence is non-negotiable.
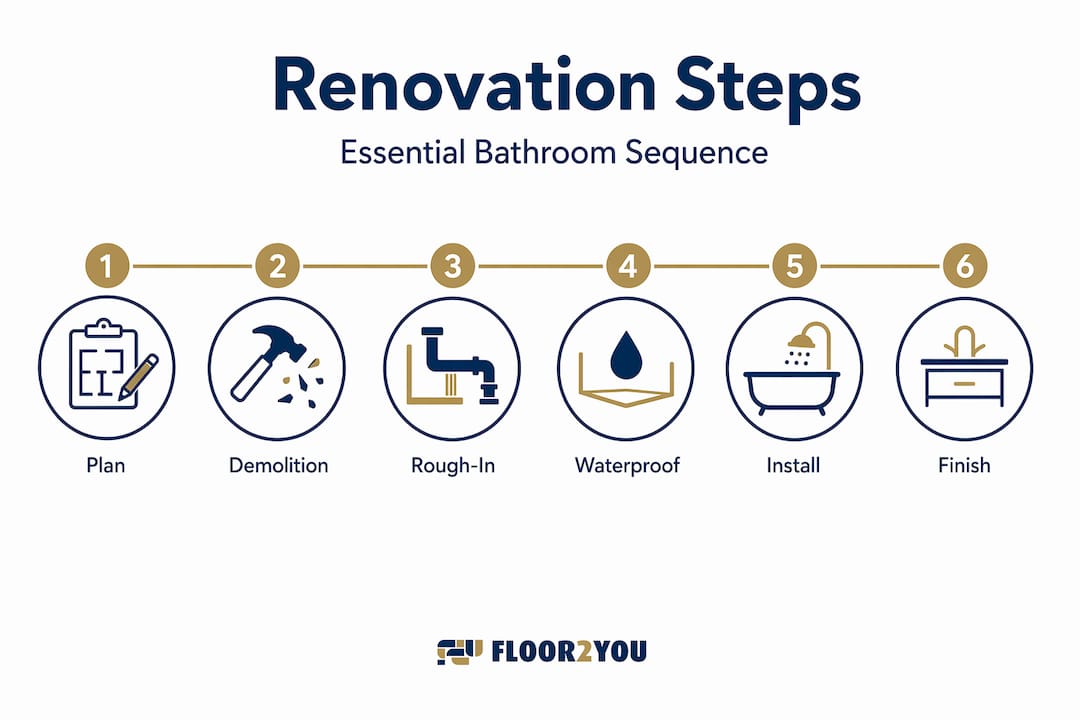
The right installation order
| Phase | What happens | Why it must come first |
|---|---|---|
| Plumbing rough-in | Drain, supply lines, shower pan base | Must pass inspection before walls close |
| Electrical rough-in | New circuits, AFCI breakers, exhaust fan wiring | Inspector must see wiring before drywall |
| Waterproofing | Membrane on walls and floor of wet areas | Must cure fully before any tile goes up |
| Cement board or backer | Wall substrate in wet zones | Goes over framing, under membrane |
| Tile and grout | Floor, shower walls, backsplash | Comes after all wet work is inspected |
| Fixtures and trim | Toilet, vanity, faucets, lights | Always the last step |
Waterproofing done right
Per current building codes, shower waterproofing membranes must extend at least 72 inches above the drain. Applying a membrane only to the floor is one of the most common inspection failures. Use a liquid-applied or sheet membrane system, overlap seams by at least two inches, and pay extra attention to inside corners where leaks almost always originate.
Before any tile goes on the shower floor, you must pass a shower pan flood test. This means plugging the drain, filling the pan two inches deep with water, and letting it sit for 24 hours. Any water loss means the membrane has a leak. Skip this test and you will be removing tile later to find and fix it at significant cost.
Exhaust fan installation and ventilation compliance
Bathrooms must have either an openable exterior window of at least 1.5 square feet or a mechanical exhaust fan providing at least 50 CFM intermittent or 20 CFM continuous airflow vented to the outside. Here is the catch most homeowners miss: fan CFM box ratings reflect free-air performance, not what the fan actually delivers through ductwork. A fan rated at 80 CFM may deliver only 45 CFM when fighting duct resistance from a long run or tight turns. Always check the manufacturer's pressure-performance data and buy HVI-certified fans to stay on the right side of code.
Finishing touches and final inspections
You are in the home stretch, but this phase still demands discipline. Rushing the finish work creates visible defects and potential inspection failures.
- Wait for grout cure time of 24 to 48 hours minimum before applying sealer or exposing grout to water. Tiling over a damp membrane promotes mold and tile failure.
- Install cabinets and vanities before countertops so you can shim and level properly
- Paint walls after tile is set but before fixtures are installed to get clean edges without masking everything
- Install the toilet last, after flooring is fully grouted and sealed
- Set the toilet flange at the correct height: it should sit at or slightly above the finished floor level. Inspectors catch low flanges regularly and it is among the top final inspection failures
- Test every supply line, drain, and fixture for leaks before calling for your final inspection
Pro Tip: Schedule your final inspection before the inspector's Friday afternoon slot. Earlier in the week gets you faster re-inspection turnaround if anything needs a minor correction.
Check your permit requirements to understand exactly what the final inspection covers. Inspectors typically verify AFCI breaker installation, exhaust fan operation, proper venting, flange height, and waterproofing documentation.
Common problems and how to avoid them
Even well-planned projects hit obstacles. The difference between a $22,000 remodel and a $30,000 remodel is usually not the tile you chose. It is the mistakes made along the way.
- Skipping permits on "small" jobs. Many homeowners incorrectly believe minor fixture swaps require no permits. Swap a tub for a walk-in shower and you trigger permits in almost every jurisdiction. Unpermitted work creates serious problems at resale.
- Wrong sequencing. Doing drywall before the plumbing inspection, or tiling before the flood test, means tearing out finished work. Follow the installation order without shortcuts.
- Undersized exhaust fans. Most installed fans are undersized because buyers trust the box rating without accounting for duct resistance. This leads to moisture buildup, mold, and a failed inspection.
- Ignoring cure times. Laying tile over a membrane that has not fully cured is the number-one cause of bathroom mold hidden behind walls.
"The contractors who never have re-inspections are the ones who read the inspection checklist before they start, not after." — Building inspection best practices
When in doubt, bring in a licensed professional for the trades. The cost of hiring a licensed plumber or electrician is almost always lower than the cost of fixing DIY work that fails inspection.
My honest take on bathroom renovation management
I've watched homeowners spend six months researching bathroom design ideas, picking the perfect tile, and then blow their timeline in the first week because they skipped the permit application. The permit process is slow and unglamorous, but it is the single most important thing you do before picking up a tool.
What I've learned is that most renovation disasters come from one of two places: starting demolition before materials are confirmed and on-site, or treating the inspection schedule as an afterthought. Inspectors are not adversaries. They are a free second set of eyes that catch errors before they get buried in walls.
The DIY bathroom makeover content you find online consistently underestimates the complexity of waterproofing and ventilation. These are not finishing details. They are structural decisions that determine whether your bathroom is healthy in ten years or harboring mold behind beautiful tile. Invest in getting them right.
Balancing quality finishes with a realistic budget is genuinely hard. My recommendation: spend on the things you touch and see every day, like a quality faucet and durable floor tile, and save on things that only affect aesthetics, like decorative accessories you can update later. A stepwise approach to bathroom improvement that respects the sequence and the inspections will always outperform a rushed one.
— G
Ready to take the next step with Floor2you?
A well-executed bathroom renovation adds real value to your home, but only when every phase is done correctly. Floor2you has helped hundreds of South Florida homeowners complete stunning bathroom transformations without the budget overruns and permit headaches that derail DIY projects.

Whether you are starting a complete bathroom remodel or need guidance on flooring options that meet wet-area requirements, Floor2you delivers craftsmanship you can trust. Explore bathroom remodeling services and see how a proven team makes the renovation process predictable, code-compliant, and worth every dollar you invest. Get your free quote today and stop guessing at what comes next.
FAQ
How long does a step by step bathroom renovation take?
A full bathroom remodel takes 6 to 12 weeks of on-site construction, with planning and permitting adding 2 to 6 months before work begins. Total project time from first decision to final inspection typically runs 4 to 8 months.
Do I always need a permit for a bathroom remodel?
Any work involving moving plumbing, adding electrical circuits, or replacing a tub with a shower requires permits in most jurisdictions. Cosmetic updates like painting or replacing a faucet in the same location generally do not.
What causes most bathroom renovation inspection failures?
The most common inspection failures involve waterproofing membranes that do not reach the required 72-inch height, exhaust fans that deliver insufficient CFM due to poor duct design, and toilet flanges set too low relative to the finished floor.
What is a shower pan flood test?
A shower pan flood test plugs the drain, fills the pan with two inches of water, and holds it for 24 hours before any tile is installed. Any water loss indicates a membrane leak that must be fixed before tiling begins.
How much should I budget for a full bathroom renovation?
Budget a minimum of $13,000 for a mid-range remodel and $22,000 or more for a major renovation, plus a 15 to 20 percent contingency for unexpected structural or plumbing issues discovered during demolition.