TL;DR:
- In South Florida remodels, proper sequencing of HVAC, subfloor readiness, and acclimation is crucial to prevent costly flooring failures. Rushing installation without meeting environmental and moisture conditions often results in cupping, gaps, and warranty voids. Using gate-driven scheduling and thorough documentation helps ensure long-lasting, high-quality flooring outcomes.
Planning a home remodel in South Florida feels exciting right up until the moment your new hardwood floors start cupping two weeks after installation because the HVAC wasn't running. That single mistake can cost thousands in rework, delay your entire project by weeks, and void your flooring warranty in one shot. South Florida's heat, humidity, and year-round moisture make sequencing more critical here than almost anywhere else in the country. This guide walks you through exactly how to manage your remodel from start to finish, with flooring sequencing at the center, so you can avoid the most expensive mistakes homeowners make.
Table of Contents
- Preparing for a successful remodel: Setting the foundations
- Step-by-step flooring management: Sequencing and execution
- Quality assurance and punch-list closeout
- Why most remodels fail: Sequencing flooring and predecessor trade management
- Get expert project management support for your remodel
- Frequently asked questions
Key Takeaways
| Point | Details |
|---|---|
| Plan sequence carefully | Ensure subfloor and HVAC readiness before scheduling flooring installation. |
| Pause for environmental checks | Never proceed with flooring if moisture or flatness thresholds are exceeded. |
| Follow step-by-step workflow | Use a structured approach for prepping, installing, and inspecting flooring during remodels. |
| Punch-list closeout matters | Final inspection is critical for catching defects and securing satisfaction and warranties. |
| Professional advice reduces risk | Expert project management keeps your remodel on track and avoids costly mistakes. |
Preparing for a successful remodel: Setting the foundations
Once you understand the challenges ahead, the smartest move is building a solid foundation before a single plank hits the floor. Good home remodel planning separates projects that finish on time from those that spiral into rework and budget overruns.
Subfloor readiness is your first gate
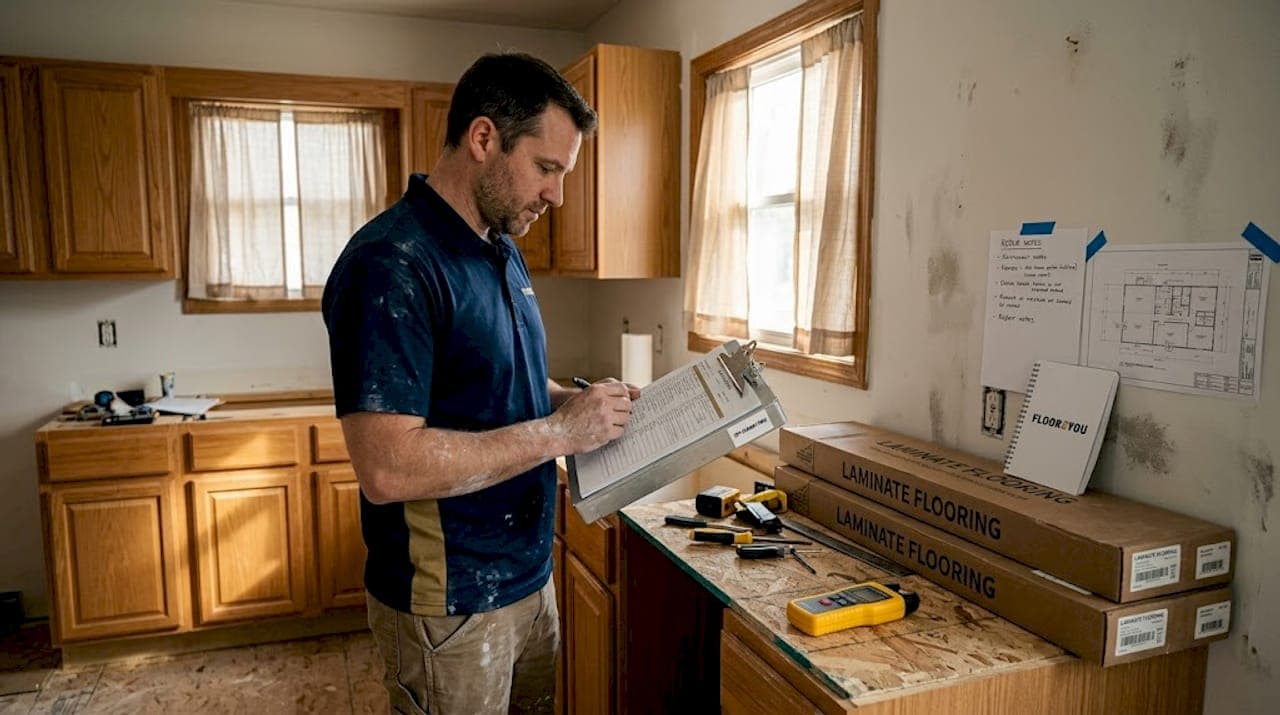
Before flooring even gets ordered, your subfloor needs to pass two critical tests: moisture content and flatness. In South Florida, concrete slabs absorb ground moisture constantly, especially during rainy season from June through October. A concrete moisture vapor emission rate (MVER) above 3 lbs per 1,000 square feet per 24 hours is generally too high for most hardwood and many vinyl adhesive products. Flatness tolerances matter just as much. Most flooring manufacturers require no more than 3/16 inch variation over 10 feet. Anything beyond that causes lippage (uneven edges between planks), squeaking, and premature wear.
Use a pin-type or pinless moisture meter on wood subfloors, and a calcium chloride test or RH (relative humidity) probe on concrete. These aren't optional steps. They are the literal green light for whether flooring work can begin.
HVAC commissioning before flooring arrives
This is where South Florida remodels go wrong more often than any other single factor. Flooring work is best treated as conditionally dependent on predecessor trades, specifically subfloor readiness, moisture and flatness conditions, and HVAC commissioning, with final punch-list closeout after installation. If your HVAC system isn't running and maintaining interior conditions close to the home's permanent climate before flooring is delivered, acclimation is meaningless. Wood and laminate products acclimate to the environment they're sitting in. If that environment is 85°F and 80% relative humidity instead of a conditioned 75°F and 50% RH, the flooring is acclimating to the wrong conditions entirely.
Plan for HVAC to be operational at least 48 to 72 hours before flooring is delivered. Ideally, it should run for 5 to 7 days before installation begins on moisture-sensitive products like solid hardwood.
Prerequisites checklist before flooring begins
Use the flooring installation checklist to confirm these conditions before scheduling your installer:
- Subfloor moisture levels within manufacturer specifications
- Subfloor flatness within 3/16 inch over 10 feet
- All plumbing rough-in work completed and tested
- All tile work in wet areas (bathrooms, kitchens) completed and cured
- Baseboards and trim removed or scheduled for post-installation
- HVAC system operational and stabilizing interior conditions
- Flooring materials delivered and acclimating on-site
Pre-installation readiness comparison table
| Condition | Acceptable range | Risk if ignored |
|---|---|---|
| Concrete moisture (MVER) | Below 3 lbs/1,000 sq ft/24 hrs | Adhesive failure, bubbling |
| Wood subfloor moisture | Within 4% of flooring product | Cupping, buckling |
| Subfloor flatness | 3/16" per 10 ft max | Lippage, cracking joints |
| Interior RH during acclimation | 35% to 55% | Gapping or swelling |
| HVAC run time before install | 48 to 72 hours minimum | Acclimation failure |
Pro Tip: Take photos and written readings of your moisture and flatness tests before installation begins. If a warranty claim ever comes up, that documentation is your best protection.
Step-by-step flooring management: Sequencing and execution
With all prerequisites confirmed, you can move confidently into the execution phase. This is where most homeowners breathe a sigh of relief, but it's also where small sequencing errors can still derail the entire project.
The sequenced workflow from assessment to punch-list
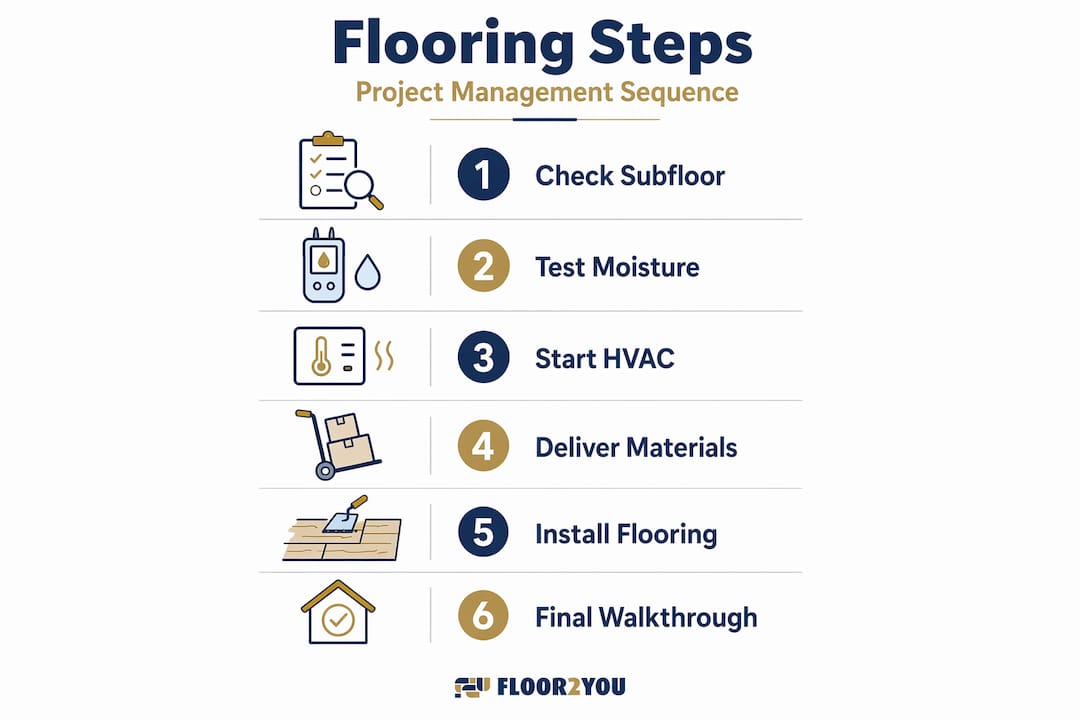
Flooring phases start with subfloor assessment and remediation and end with post-installation inspection and punch-list. For moisture-sensitive flooring, attempting installation before HVAC commissioning can drive acclimation failures including cupping, gapping, and adhesive failure. Here is a reliable step-by-step workflow:
- Complete all demolition and debris removal. Old flooring, adhesive residue, and staples must be fully removed before assessment begins.
- Perform subfloor assessment. Test moisture content and flatness. Document the results.
- Remediate any subfloor issues. This may include grinding high spots, filling low spots with self-leveling compound, or applying a moisture barrier coating on concrete.
- Confirm HVAC is commissioned and stable. Check interior temperature and humidity readings over 24 to 48 hours.
- Deliver flooring materials and begin acclimation. Stack flooring in the rooms where it will be installed, not in a garage or storage area with different climate conditions.
- Confirm acclimation period is complete. Most hardwood needs 3 to 7 days. Follow the specific manufacturer guidance for your product.
- Begin installation. Start from a reference wall and work outward. Verify adhesive spread rates, nail spacing, or click-lock engagement as required.
- Install transitions and trim. Thresholds, T-moldings, and reducers go in after the field flooring is complete.
- Conduct punch-list inspection. Walk every room methodically and document any lippage, gaps, squeaks, or finish defects.
- Sign off only after all punch-list items are resolved. Never accept a completed job with open items remaining.
When to pause: Conditions that should stop installation
Knowing when to stop is just as important as knowing how to proceed. If moisture readings spike due to a rainy week or a plumbing leak, installation must pause. If the HVAC trips offline for even 24 hours in the middle of acclimation, reset the acclimation clock. These pauses feel frustrating in the moment, but they protect your investment for years.
"The single most expensive flooring mistake we see in South Florida remodels is rushing installation to hit a move-in deadline, only to have the floor fail within 90 days. The repair cost always exceeds the time saved."
Professional vs. DIY sequencing comparison
| Factor | Professional management | DIY management |
|---|---|---|
| Moisture testing | Calibrated meters, documented results | Consumer meters, often skipped |
| HVAC coordination | Scheduled with trades in advance | Often overlooked until too late |
| Subfloor remediation | Identified and corrected before install | Frequently discovered mid-install |
| Warranty protection | Installer backs the work | Voided if errors occur |
| Punch-list process | Formal written closeout | Informal or skipped entirely |
| Acclimation oversight | Monitored and documented | Estimated or guessed |
If you're going the DIY route, the laminate installation guide for South Florida homeowners covers acclimation, moisture prep, and sequencing specific to laminate products. For homeowners who want professional support from the start, learning about hiring flooring contractors helps you ask the right questions before signing any contract.
Pro Tip: Ask your contractor for the specific moisture and flatness readings they recorded before starting installation. Any reputable professional will have this documentation ready. If they can't produce it, that's a serious red flag.
The installation checklist is a practical tool you can bring to any job site to verify steps are being followed in the correct order.
Quality assurance and punch-list closeout
After flooring installation and sequencing come to a close, the real test begins. Quality assurance isn't just a formality. It's the process that determines whether your investment holds up for 10, 20, or 30 years.
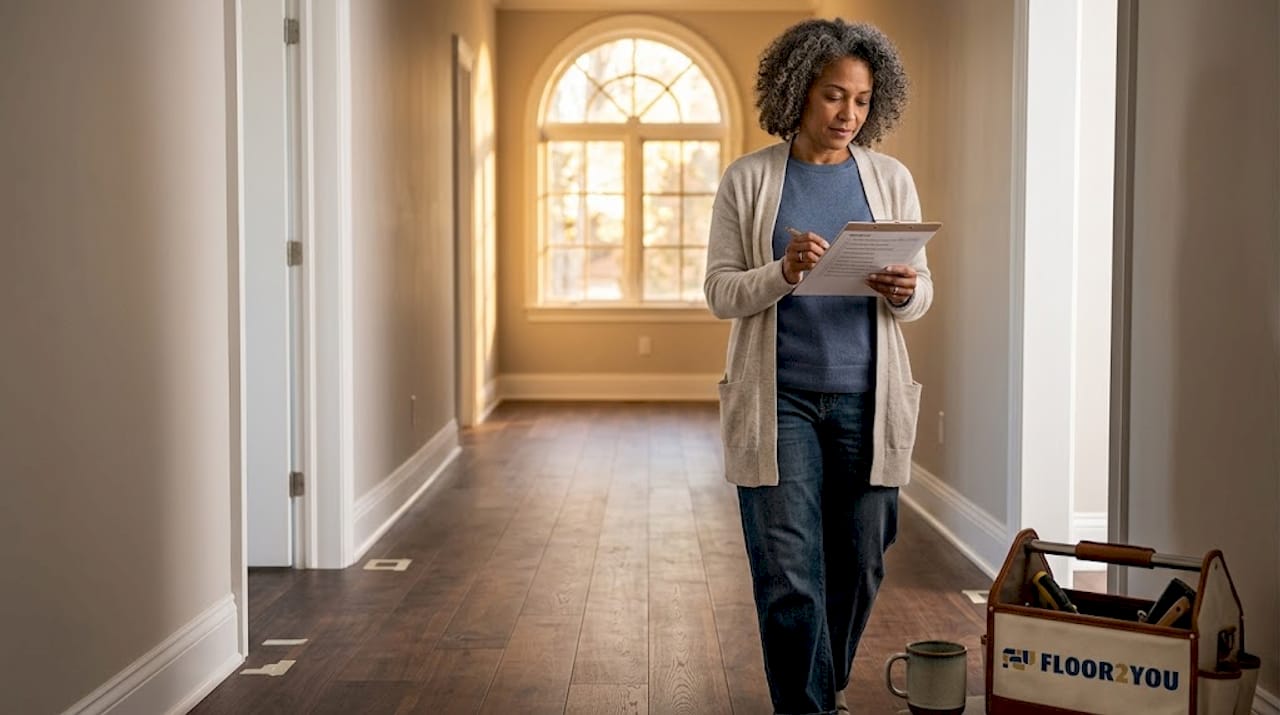
The punch-list process explained
A punch-list is a written record of every defect, incomplete item, or quality concern identified after installation. Punch-list closeout after installation is crucial for catching defects and ensuring all phases meet standards. Think of it as your final quality gate before you sign off and release payment.
Walk every room systematically, starting at one corner and moving in a grid pattern. Get low to look across the surface at a low angle, which reveals lippage and surface irregularities that aren't visible when standing upright. Tap wooden floors in a grid pattern to identify hollow spots, which signal poor adhesive contact or a failed bond beneath the surface.
Post-installation inspection checklist
Use this checklist during your punch-list walkthrough:
- No visible lippage between planks or tiles exceeding 1/16 inch
- No hollow-sounding areas (for glue-down applications)
- Consistent grout lines or plank alignment throughout the space
- No gaps at walls larger than the baseboard or quarter-round will cover
- Transitions and thresholds secured and level at doorways
- No squeaking or movement underfoot in any area
- Surface finish free from scratches, scuffs, or adhesive residue
- Expansion gaps maintained at all walls and fixed objects
Key quality metric: Industry data shows that post-installation defects are significantly easier and cheaper to address immediately after completion than after furniture, rugs, and foot traffic have been introduced. The longer defects go unaddressed, the more the surrounding flooring adapts around them, making repairs more visible.
Refer to the bathroom workflow guide if your remodel includes tile work in wet areas, since bathroom floors carry additional inspection requirements around grout sealing, caulk joints at transitions, and waterproof membrane integrity.
Long-term flooring performance starts at closeout
Signing off on a completed job should come with a clear set of maintenance expectations from your installer. Ask for the manufacturer's recommended cleaning products, humidity maintenance ranges, and refinishing schedule if applicable. South Florida homes need to maintain interior humidity between 35% and 55% year-round to protect hardwood and laminate products from seasonal expansion and contraction. A whole-home dehumidifier is often a worthwhile addition to a remodel budget for this exact reason.
Why most remodels fail: Sequencing flooring and predecessor trade management
After years of managing remodels across South Florida, we've come to one uncomfortable conclusion: most flooring failures aren't product failures. They're sequencing failures. The flooring gets blamed, but the real culprit is almost always a decision made days or weeks before the first plank was installed.
Gate-driven scheduling is non-negotiable
The concept is simple even if it's difficult to enforce under project pressure. Treat subfloor moisture and flatness and HVAC readiness as gates. Flooring schedules should pause if conditions exceed manufacturer thresholds. A gate is a hard stop. Not a suggestion. Not a risk to accept and move forward anyway. A gate means the project does not advance until the condition is met, period.
The reason homeowners and even some contractors skip gates is timeline pressure. A move-in date is locked. Furniture is arriving. Renting is costing money. So someone makes the call to install anyway, figuring it will probably be fine. And sometimes it is fine. But in South Florida, where ambient humidity routinely exceeds 70%, "probably fine" is a gamble that loses far more often than it wins.
Real-world consequences of premature installation
We've seen solid white oak floors installed in a home where the slab was still releasing construction moisture from a fresh pour. Six weeks later, the boards had cupped so severely that full replacement was the only option. The installer had documentation showing installation proceeded without a moisture test. The homeowner had no legal recourse and paid out of pocket.
We've also seen laminate installed during an HVAC repair period, a two-week window with no air conditioning, in a humid August. By the time the system was back online, the laminate had expanded at the joints and the click-lock seams had separated in three rooms. Again, the product wasn't defective. The conditions were.
The uncomfortable truth about waiting
Waiting feels like losing time. In reality, a 7-day hold for proper HVAC commissioning and acclimation saves you from a potential 4 to 6 week rework process plus the cost of replacing materials. When you frame the decision that way, the math is obvious. Patience isn't passive. It's the most active risk-management decision you can make during a remodel.
Exploring the types of home renovations that benefit most from gate-driven scheduling, including kitchen remodels with new subfloor systems and full bathroom gut renovations, shows you just how consistent this principle is across project types.
Get expert project management support for your remodel
You've now seen exactly where remodels go wrong and what it takes to get them right. The stakes are real, the moisture is real, and the cost of sequencing errors in South Florida is very real.

At Floor2You, we manage every phase of your remodel with gate-driven precision, from subfloor assessment and HVAC coordination to final punch-list sign-off. Our team serves homeowners across South Florida with the kind of hands-on project oversight that prevents the costly surprises described throughout this guide. Whether you're planning a full home renovation, a kitchen update, or a flooring replacement, we bring the sequencing knowledge and quality standards your project deserves. Contact our team today to schedule a consultation and get a clear, transparent plan for your remodel from day one.
Frequently asked questions
When should flooring installation happen during a remodel?
Flooring installation should only occur after subfloor conditions and HVAC readiness are confirmed to meet manufacturer thresholds, since flooring work depends on subfloor readiness, moisture and flatness conditions, and HVAC commissioning being completed first.
What are the risks of installing flooring too early?
Premature installation commonly causes cupping, gapping, or adhesive failure, because installation before HVAC commissioning drives acclimation failures in moisture-sensitive flooring products.
How can I ensure my flooring passes final inspection?
Conduct a thorough punch-list walkthrough after installation, checking every room for lippage, hollow spots, gaps, and finish defects, because punch-list closeout is crucial for catching defects before final sign-off.
What should I look for in a flooring contractor?
Choose contractors who use gate-driven scheduling, document moisture and flatness readings before starting, pause for environmental concerns, and provide a formal punch-list process at project completion.