TL;DR:
- The kitchen cabinet upgrade process involves evaluating, preparing, and transforming cabinetry through refinishing, refacing, or replacement to enhance function and appearance. Proper assessment, surface prep, and choosing the right method based on cabinet condition are essential for durability and cost-effectiveness. Coordination and patience ensure a successful renovation that provides high visual return and long-lasting results.
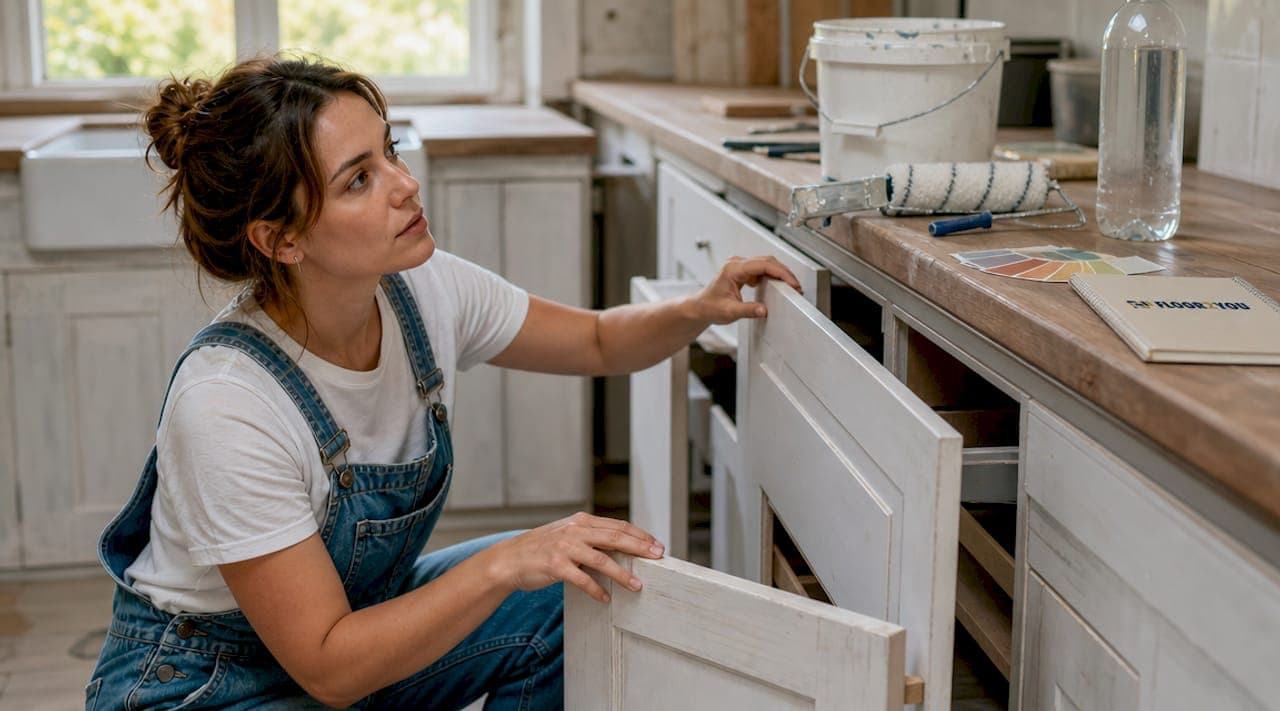
The kitchen cabinet upgrade process is defined as the structured sequence of evaluating, preparing, and transforming your existing cabinetry through painting, refacing, or full replacement to improve both function and appearance. Most homeowners treat it as one decision when it is actually three: what condition are your cabinets in, which method fits your budget, and how do you execute it without costly mistakes. Get those three right, and a kitchen cabinet renovation delivers some of the highest visual return of any home improvement project.
What is the kitchen cabinet upgrade process?
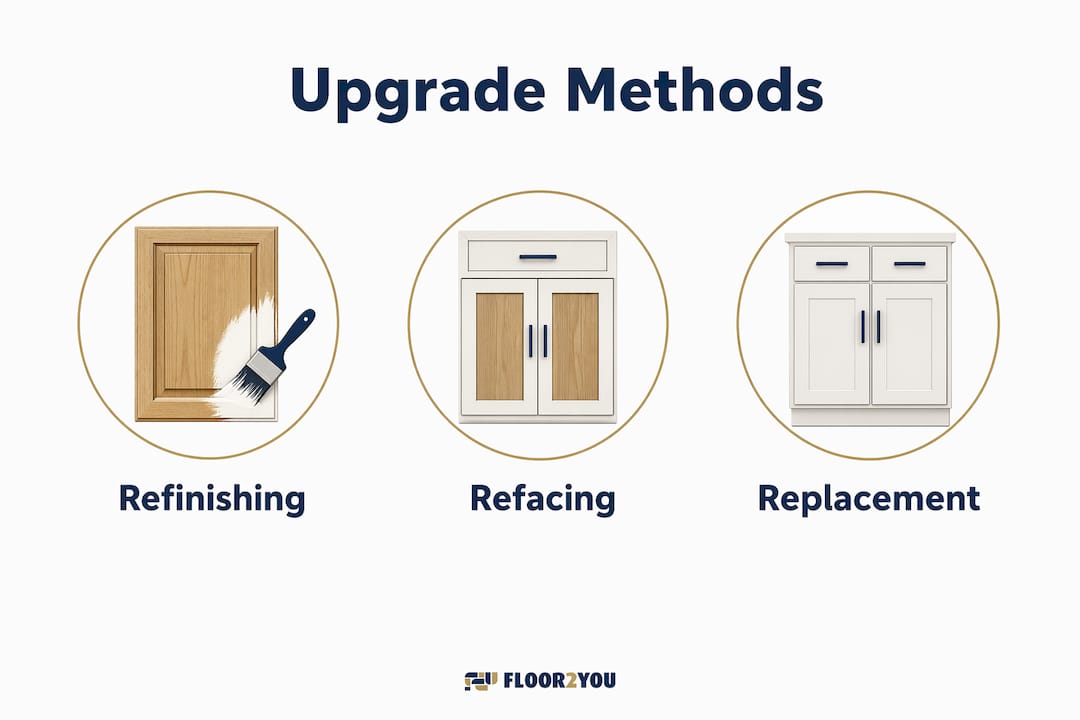
The upgrade process breaks into three distinct methods, each suited to a different cabinet condition and budget. Refinishing covers the surface with paint or stain. Refacing replaces the visible fronts while keeping the existing box structure. Full replacement removes everything and starts from scratch. Choosing the wrong method for your situation wastes money and time, so the decision framework matters as much as the execution.
DIY painting materials typically cost $150 to $400, while professional full replacement ranges from $5,000 to $25,000. That gap is enormous, and it means most homeowners have a financially compelling reason to explore refinishing or refacing before committing to replacement. The cost of cabinet upgrades scales directly with how much of the existing structure you discard.
Understanding the full scope before you start is the single most important step. A kitchen remodeling checklist helps you map out materials, timelines, and contractor coordination before the first cabinet door comes off its hinge.
How to evaluate your current kitchen cabinets before upgrading
Cabinet evaluation follows a three-layer diagnostic. Assess cabinets in three layers: the box (the structural carcass), the fronts (doors and drawer faces), and the skin (the visible finish). Only refinish or reface if the boxes are structurally sound. If the boxes are compromised, replacement is the only path forward.
What to look for during your inspection:
- Water damage or swelling: Press along the bottom and sides of cabinet boxes. Swollen particleboard or soft spots signal moisture infiltration that paint cannot fix.
- Warped doors or drawer fronts: Warped or outdated doors do not respond well to paint. Refinishing highlights the warp rather than hiding it. Replace the doors while keeping the boxes if the structure is solid.
- Loose frames or failing joints: Wiggle each cabinet box. Any movement means the frame is failing, and cosmetic work will not restore stability.
- Outdated layout: If your cabinet placement creates workflow problems, no amount of paint or new doors solves that. A layout problem requires replacement or a full kitchen redesign.
- Finish condition: Peeling laminate, deep scratches, or heavily stained wood can still be refinished if the underlying material is intact and flat.
Pro Tip: Run a structural diagnostic before buying a single can of primer. Check for water damage, warped shelves, loose frames, and swollen particleboard. Cosmetic upgrades applied over structural problems fail within months.
The evaluation stage also determines your timeline and contractor needs. Refinishing a set of solid wood cabinet doors is a realistic weekend project. Replacing 20 linear feet of cabinetry in a South Florida kitchen requires permits, a contractor, and a realistic four-week window. Know which category you are in before you budget.

How do you refinish kitchen cabinets step by step?
Refinishing is the most accessible upgrade method, but it fails more often than it should because homeowners skip preparation. Meticulous prep, including removing hardware, deep degreasing, sanding, applying a bonding primer, and using high-quality cabinet enamel, is what separates a finish that lasts five years from one that chips in five months.
Follow this sequence for a professional result:
- Remove all doors, drawer fronts, and hardware. Label each door with painter's tape and a marker so reinstallation is exact. Photograph hinge positions before removal.
- Degrease every surface. Kitchen cabinets accumulate grease that standard cleaners miss. Use a TSP substitute or a dedicated degreaser, and wipe twice. Any grease left on the surface causes primer adhesion failure.
- Sand all surfaces. Use 120-grit sandpaper to scuff the existing finish, then follow with 220-grit for smoothness. Sand with the grain on wood. Wipe away all dust with a tack cloth before priming.
- Apply a bonding primer. A high-quality primer matched to your cabinet material is non-negotiable for paint adhesion and durability. Shellac-based primers work on most wood species and block tannin bleed. Water-based bonding primers suit MDF and laminate.
- Apply cabinet-grade enamel or stain in thin coats. Two to three thin coats outperform one thick coat every time. Thick coats sag, trap bubbles, and take longer to cure. Use a fine-finish roller for flat surfaces and a quality brush for detail areas.
- Allow full curing time. Skipping the 7 to 14-day curing period after refinishing leads directly to peeling and chipping. The finish may feel dry to the touch in 24 hours, but it is not hard enough to withstand daily cabinet use for at least a week.
"The number one refinishing mistake is reinstalling doors the day after painting. The finish looks dry, but it is still soft. One hard close and you have a permanent dent in your new paint job."
Pro Tip: Refinishing kits like Rust-Oleum Cabinet Transformations use a multi-stage process including a prep coat, bond coat, and protective topcoat. They cost more than buying individual products, but the system reduces guesswork and produces more consistent results for first-time refinishers.
What is cabinet refacing and when does it make sense?
Cabinet refacing is the process of replacing all visible surfaces, including doors, drawer fronts, and the exposed sides of cabinet boxes, while leaving the existing box structure in place. It changes the entire look of a kitchen without the demolition, debris, and cost of full replacement. Refacing saves homeowners 30 to 50% compared to full cabinet replacement, which makes it the most financially efficient option when the boxes are structurally sound but the style is dated.
| Factor | Refacing | Full replacement |
|---|---|---|
| Cost savings | 30 to 50% less than replacement | Highest cost option |
| Timeline | 1 to 5 days | 2 to 4 weeks |
| Layout change | No | Yes |
| Best for | Sound boxes, dated style | Damaged boxes or poor layout |
| DIY feasibility | Moderate | Low without contractor |
Refacing is ideal when the cabinet layout meets your needs but the door style or finish dates the kitchen. If you love where your cabinets are but hate how they look, refacing is the answer. If you wish the cabinets were in a different position entirely, refacing does not solve that.
The most common refacing error is inaccurate door measurement. Measure cabinet door overlay precisely using a speed square to confirm proper hinge function and avoid gaps. A door that is even 1/8 inch off on overlay creates visible gaps and hinge binding that requires the entire door to be reordered.
Pro Tip: When ordering new doors for a reface, order one sample door first and hang it before placing the full order. Finish colors and wood grain patterns look different in a showroom than they do under your kitchen lighting.
You can also replace kitchen doors without committing to a full reface. Swapping just the doors while veneering the exposed box sides is a middle-ground approach that works well when the existing door style is the only problem.
When should you replace cabinets entirely?
Full cabinet replacement is the right choice in specific, identifiable situations. It is not the default upgrade path, and it should not be chosen simply because it feels more thorough. Replacement makes sense when the existing boxes are structurally compromised, the layout creates genuine functional problems, or the kitchen requires a complete reconfiguration to meet modern storage and workflow needs.
Signs that replacement is the correct decision:
- Cabinet boxes show water damage, rot, or swelling that affects structural integrity
- The existing layout blocks natural workflow or cannot accommodate modern appliances
- The cabinets are made from materials that do not accept refinishing or refacing well, such as heavily damaged particleboard
- You are already doing a full kitchen gut renovation that includes new flooring, plumbing, or electrical work
- The existing cabinets are so old that new hardware and hinges are no longer available in compatible sizes
The scope of a full replacement includes demolition, disposal of old cabinets, new cabinet selection, delivery, and installation. In South Florida, that process typically runs two to four weeks from demolition to final installation, not counting the lead time for custom or semi-custom cabinet orders, which can add four to eight weeks. Coordinating replacement with other remodel tasks, such as new countertops, backsplash tile, or flooring, requires careful scheduling so trades do not block each other.
Understanding why updating your kitchen design matters beyond aesthetics helps frame the investment. New cabinet layouts can add measurable storage capacity, improve resale value, and make daily cooking significantly more efficient.
Additional tips for enhancing your cabinet upgrade
The cabinet surface itself is only part of the transformation. Hardware, lighting, molding, and storage upgrades compound the visual and functional impact of any cabinet renovation without adding significant cost.
- New cabinet hardware: Swapping pulls and knobs is the fastest style update in a kitchen. Brushed brass, matte black, and satin nickel are the dominant hardware finishes in 2026. A set of 30 pulls costs between $60 and $200 depending on material, and installation requires only a screwdriver and a template.
- Crown molding and trim: Adding crown molding to the top of upper cabinets creates a built-in, custom look. It fills the gap between cabinet tops and the ceiling, which is one of the most common visual complaints in older kitchens.
- Under-cabinet lighting: LED strip lights or puck lights installed under upper cabinets add task lighting for countertop work and create ambient warmth in the evening. Plug-in options require no electrical work and cost under $50 for a standard kitchen run.
- Pull-out shelves and drawer dividers: Interior storage upgrades make existing cabinet space dramatically more functional. Pull-out shelves for lower cabinets eliminate the need to crouch and dig. Drawer dividers keep utensils and tools organized without adding any cabinet footprint.
Pro Tip: Coordinate your hardware finish with your faucet and light fixture finish. Mixing metals is acceptable in modern design, but mixing finishes randomly reads as unplanned. Choose one dominant finish and use it across at least 70% of your visible hardware.
What I've learned from watching cabinet upgrades go wrong
The most consistent mistake I see homeowners make is treating cabinet upgrades as a cosmetic project when they are actually a structural one. Paint and new doors are the visible result, but the durability of that result depends entirely on what happens before the first coat of primer goes on. Skipping the degreasing step, rushing the sanding, or applying paint over a damaged surface produces a finish that looks good for about three weeks and then starts failing at every stress point.
Realistic expectations matter as much as technique. A DIY refinishing project on a full kitchen takes most homeowners two full weekends, not one afternoon. Professional refacing takes one to five days, but the measurement and ordering phase takes one to three weeks before the installer ever shows up. Full replacement is a month-long project minimum when you factor in cabinet lead times.
My honest recommendation for anyone on the fence between refinishing and refacing: do one cabinet door as a test. Prime it, paint it, reinstall it, and live with it for two weeks. If the finish holds and you love the color, proceed with the full project. If the door warps, the paint chips, or the color reads differently in your actual kitchen light, you have learned that lesson on one door instead of twenty.
The structural check before any cosmetic work is non-negotiable. I have seen beautiful paint jobs applied over cabinets with soft, water-damaged boxes. Within six months, the doors are sagging and the finish is cracking because the substrate was never stable. Check the boxes first. Every time.
— G
Ready to upgrade your kitchen cabinets with Floor2You?
Floor2you handles every stage of the kitchen cabinet upgrade process for South Florida homeowners, from the initial structural assessment through final installation and finishing. Whether you are painting existing cabinets, refacing with new door fronts, or doing a complete kitchen cabinet renovation, the Floor2you team brings the materials, tools, and project management to get it done right.

Floor2you serves homeowners, property managers, and Airbnb hosts across South Florida who need reliable, high-quality remodeling work on a clear timeline. If you are ready to move from planning to execution, start your kitchen upgrade with a consultation from the Floor2you team. You get transparent pricing, experienced craftsmen, and a finished kitchen that holds up to daily use.
Key takeaways
The kitchen cabinet upgrade process succeeds when you match the upgrade method to cabinet condition, execute thorough surface preparation, and allow adequate curing time before returning cabinets to daily use.
| Point | Details |
|---|---|
| Evaluate before you upgrade | Inspect boxes, fronts, and finish for structural damage before choosing a method. |
| Match method to condition | Refinish sound surfaces, reface dated styles, replace damaged or poorly laid-out boxes. |
| Prep determines durability | Degreasing, sanding, and bonding primer are what make paint last years instead of months. |
| Refacing saves significant money | Refacing costs 30 to 50% less than full replacement and takes 1 to 5 days to complete. |
| Curing time is not optional | Allow 7 to 14 days after refinishing before subjecting cabinets to normal daily use. |
FAQ
How long does the cabinet upgrade process take?
Refinishing takes one to two weekends for a DIY project. Refacing takes one to five days for professional installation, plus one to three weeks for ordering. Full replacement takes two to four weeks on-site, with additional lead time for custom cabinet orders.
What is the cheapest way to update kitchen cabinets?
DIY refinishing with paint or stain is the most cost-effective option, with materials typically running $150 to $400 for a full kitchen. Hardware replacement adds style impact for as little as $60 to $200 and requires no special skills.
Can I reface cabinets myself?
Refacing is a moderate DIY project. Measuring door overlay precisely and applying veneer to box sides without bubbles or gaps requires patience and the right tools. Most homeowners get better results hiring a professional for the installation while handling hardware and accessory updates themselves.
When does cabinet painting fail?
Cabinet paint fails when surfaces are not properly degreased and sanded before priming, when a bonding primer is skipped, or when doors are reinstalled before the finish has cured for 7 to 14 days. Warped or damaged doors also cause paint to crack at stress points regardless of prep quality.
How do I coordinate cabinet upgrades with other kitchen remodel tasks?
Schedule cabinet work before countertop installation and after any plumbing or electrical rough-in is complete. For full replacement, confirm cabinet delivery dates before demolishing existing cabinetry. A step-by-step coordination guide helps sequence trades so no single task blocks another.