TL;DR:
- Proper safety and permit compliance are essential before starting any cosmetic upgrades in rental property renovations. Budgeting 15-20% for unexpected costs and targeting project break-even within 24 months maximizes return on investment. Standardized, durable mid-grade materials and clear contractor communication prevent costly mistakes and extend property value.
Rental property renovation is the process of making targeted upgrades to an income property to increase rent, reduce maintenance costs, and attract reliable tenants. Knowing how to renovate a rental property correctly means prioritizing safety compliance first, then cosmetic improvements that pay back within 24 months. The rental property remodeling process differs from a personal home remodel in one critical way: every dollar you spend must earn a return. This guide walks you through budgeting, project selection, contractor management, and the most common mistakes that kill investor returns.
What safety and compliance upgrades are required first?
Safety upgrades are the legal foundation of any rental property renovation. Smoke detectors, carbon monoxide alarms, and GFCI outlets cost between $50 and $500 per unit and must be installed before any cosmetic work begins. Skipping these puts you in violation of local housing codes and exposes you to liability if a tenant is injured.
Permits are the next non-negotiable step. Permit fees range from $200 to $2,000 depending on your municipality, and approval typically takes 1–4 weeks. Budget for that wait time in your project schedule so cosmetic work does not stall while you wait for inspections.
Think of safety compliance as Tier 1 repairs. Tier 1 repairs must precede Tier 2 cosmetic upgrades like kitchen refreshes and bathroom updates to protect your renovation ROI. A failed inspection after cosmetic work is complete can force you to tear out finished surfaces, which doubles your cost.
Before any renovation phase begins, conduct a full property audit. Check for outdated wiring, plumbing leaks, mold, and structural issues. Addressing these before signing a contractor for cosmetic work prevents the most expensive surprises. You should also check for signs requiring asbestos removal in older properties, since disturbing asbestos during a remodel creates serious health and legal risk.
Key safety upgrades to complete before cosmetic work:
- Smoke detectors and carbon monoxide alarms in every required room
- GFCI outlets in kitchens, bathrooms, garages, and exterior areas
- Electrical panel inspection and any required upgrades
- Plumbing leak checks and water heater compliance
- Structural inspection for rot, foundation cracks, or pest damage
- Permit applications filed and approved for all planned work
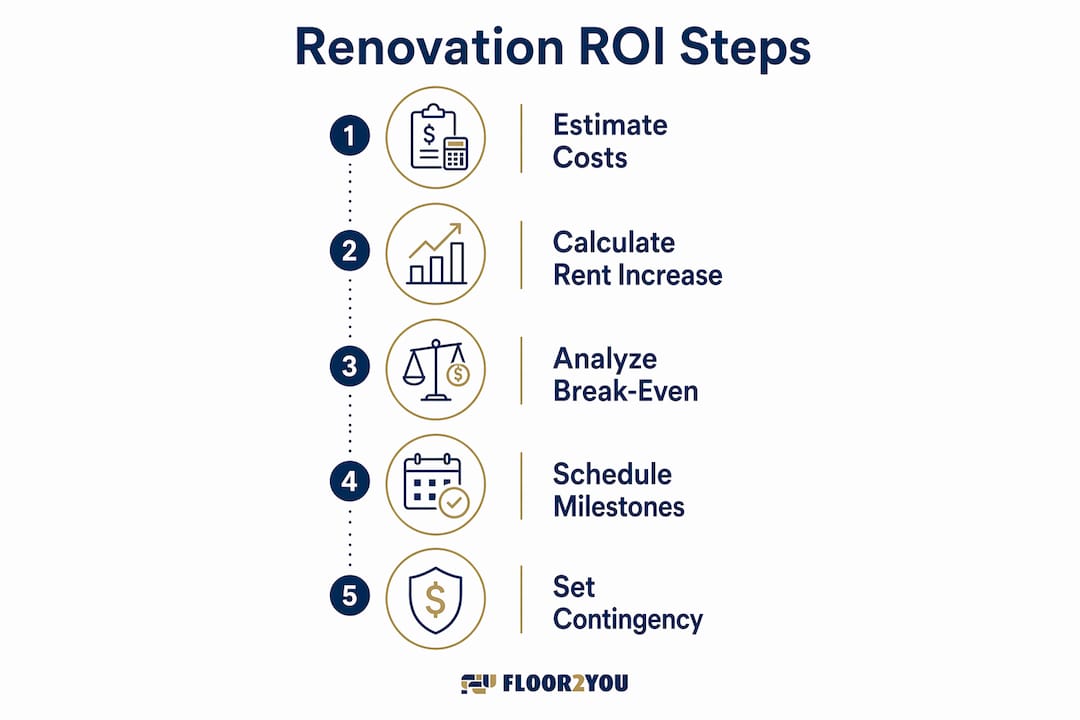
How to budget and plan your rental renovation for maximum ROI
A bottom-up budget is the only reliable method for rental property remodeling. Start with contractor bids for each trade, add material costs, then layer in permit fees and a contingency fund. Industry guidance recommends a 15–20% contingency fund on top of your total project estimate to cover hidden defects like outdated wiring or structural rot behind walls. That buffer is not optional. Most cost overruns happen because investors skip it.

Break-even analysis tells you whether a renovation is worth doing at all. A payback period under 24 months is the standard target for rental renovations, with high-turnover markets pushing that target to under 18 months. If a $15,000 kitchen refresh raises rent by $300 per month, you break even in 50 months. That fails the test. A $6,000 refresh that raises rent by $200 per month breaks even in 30 months. Still borderline. The math forces you to keep costs tight.
| Renovation Type | Typical Cost | Expected Rent Increase | Break-Even (months) |
|---|---|---|---|
| Kitchen and bath refresh | $12,000–$18,000 | $250–$400/month | 30–72 |
| Flooring replacement (LVP) | $3,000–$6,000 | $75–$150/month | 20–80 |
| Fresh paint and hardware | $1,500–$3,000 | $50–$100/month | 15–60 |
| Curb appeal and landscaping | $1,000–$2,500 | $50–$75/month | 13–50 |
Milestone scheduling keeps your project from drifting. Map out each phase from contractor bid acceptance through final inspection, and assign a completion date to each milestone. A typical rental renovation runs in this order: safety and structural work, rough trades (electrical, plumbing), drywall and paint, flooring, fixtures and appliances, final inspection, and tenant-ready cleaning.
Pro Tip: Write a detailed Scope of Work (SOW) before you contact a single contractor. The SOW lists every task, material specification, and finish standard. Contractors who bid from the same SOW give you comparable quotes, and the document becomes your contract baseline.
For investors managing multiple units, standardizing finishes across your portfolio cuts decision time and reduces per-unit material costs. Pick one paint color, one flooring product, and one hardware finish. Reordering the same materials is faster and cheaper than specifying something new for every unit.
Which renovation projects offer the best balance of durability and rent increase?
Durable, mid-grade materials outperform luxury finishes in rental properties every time. Luxury vinyl plank flooring with a minimum 12 mil wear layer resists tenant wear and moisture far better than laminate or hardwood, and it costs a fraction of tile. That wear layer specification matters. Anything below 12 mil shows scratches and dents within two years of tenant use.
The best upgrades for rentals follow a clear priority order. Fresh neutral paint is the highest-ROI project in any rental. A $1,500 paint job makes a unit feel new, photographs well for listings, and costs less than one month's vacancy. Updated cabinet hardware and light fixtures add visual impact for under $500. These small changes attract better tenants and justify higher asking rents without a full remodel.
Kitchen and bathroom refreshes deliver the next tier of returns. Replacing cabinet doors, adding new countertops, and installing a new faucet costs far less than a full gut renovation and produces nearly the same visual result. Focusing your budget on Tier 1 and Tier 2 repairs rather than luxury upgrades keeps payback periods realistic. Granite countertops and custom cabinetry belong in a personal home, not a rental.
Pro Tip: Select flooring and paint colors that photograph well under standard lighting. Warm gray LVP and white or light gray walls make units look larger in listing photos, which directly reduces vacancy time.
Over-renovating a rental is a real and costly mistake. Installing high-end appliances, custom tile, or premium fixtures in a mid-market rental does not produce proportional rent increases. The local rent ceiling caps your return regardless of what you spend. Check comparable rents in your market before committing to any upgrade above the mid-grade tier. For more on selecting quality materials for rentals, the right specification makes the difference between a two-year and a ten-year maintenance cycle.
How to communicate and manage contractors effectively
Clear contracts prevent the majority of renovation disputes. Every contractor agreement should specify the full scope of work, material specifications, payment schedule, start date, and completion date. Vague contracts produce vague results. A detailed Scope of Work and scheduled contractor updates reduce cost overruns and schedule slippage more than any other single practice.
Follow this communication structure for every project:
- Pre-construction meeting: Review the SOW line by line with the contractor before work begins. Confirm material selections, access arrangements, and daily work hours.
- Daily or weekly check-ins: For projects over two weeks, schedule brief daily updates by text or phone. For shorter projects, a weekly site visit is sufficient.
- Milestone sign-offs: Inspect and approve each phase before the contractor moves to the next. Do not release payment for a phase until you have walked the work.
- Change order protocol: Any change to scope, materials, or timeline requires a written change order with a revised cost and schedule. Verbal agreements create disputes.
- Final walkthrough: Complete a punch list before the final payment. Document every unfinished or deficient item in writing and set a deadline for completion.
Hiring licensed, insured contractors and pulling proper permits is a legal requirement, not a preference. An unlicensed contractor who causes damage or injury leaves you holding the liability. Verify license and insurance certificates before signing any contract.
If the property is occupied during renovation, communicate the schedule to tenants in writing at least two weeks in advance. Specify which areas will be affected, estimated noise levels, and daily work hours. Tenants who feel informed are far less likely to file complaints or break their lease. Tenant retention during renovation depends heavily on how well you manage communication and minimize disruption.
Common mistakes to avoid when renovating a rental property
Under-budgeting is the most common reason rental renovations fail to deliver returns. Investors who skip the contingency fund hit unexpected costs and either cut corners on finishes or run out of money mid-project. Both outcomes hurt the final rent and extend vacancy.
"A rental property is an income-producing asset, not a personal sanctuary. Every upgrade decision should be tested against one question: does this increase rent or reduce maintenance costs enough to justify the spend? If the answer is no, skip it."
The most damaging mistakes follow a predictable pattern:
- Skipping the contingency fund: Hidden defects behind walls and floors are common in properties over 20 years old. Budget 15–20% above your estimate.
- Over-renovating for the market: Installing luxury finishes in a mid-market rental extends payback beyond the useful life of the improvement.
- Ignoring permit requirements: Unpermitted work can void your insurance, trigger fines, and complicate future sales.
- Poor contractor vetting: Choosing the lowest bid without verifying license and insurance creates legal and financial exposure.
- Prolonged vacancy from poor scheduling: Overlapping trades and missed milestones add weeks of vacancy. Each vacant week costs you rent.
Re-assessing scope mid-project is a sign of good management, not failure. If you open a wall and find unexpected electrical or plumbing issues, pause, get a revised estimate, and decide whether to proceed or adjust the scope. Pushing through without adjusting the budget is how small surprises become large losses. For a deeper look at maximizing renovation ROI, the math on when to renovate versus rent as-is is worth reviewing before you commit.
Key Takeaways
A successful rental renovation prioritizes safety compliance first, uses a bottom-up budget with a 15–20% contingency fund, and targets only upgrades that break even within 24 months.
| Point | Details |
|---|---|
| Safety upgrades come first | Complete smoke detectors, GFCI outlets, and permits before any cosmetic work. |
| Budget with a contingency fund | Add 15–20% above your estimate to cover hidden defects behind walls and floors. |
| Target a 24-month break-even | Only approve upgrades where the rent increase recoups the cost within 24 months. |
| Choose durable mid-grade materials | LVP flooring with a 12 mil wear layer reduces maintenance and holds up to tenant use. |
| Manage contractors with written SOWs | A detailed Scope of Work and milestone sign-offs prevent cost overruns and disputes. |
What I've learned from watching investors over-renovate
The most consistent mistake I see is treating a rental like a personal home renovation. Investors get emotionally attached to finishes, spend $20,000 on a kitchen that supports maybe $150 more per month in rent, and then wonder why the numbers do not work. The math was never going to work. The local rent ceiling does not care about your quartz countertops.
The investors who build real wealth from rentals do the opposite. They standardize everything. One paint color, one flooring product, one hardware finish across every unit. When a tenant moves out, the turn takes days instead of weeks because every material is in stock and every contractor knows the spec. That standardization compounds over a portfolio.
Durability beats aesthetics in a rental every time. A floor that lasts ten years with zero maintenance is worth three times a floor that looks slightly better but needs replacing in four years. The same logic applies to fixtures, appliances, and paint. Choose the product that survives the most abuse, not the one that photographs best in a staged shoot.
Regularly reviewing your renovation process after each project is the habit that separates improving investors from stagnant ones. What cost more than expected? What finished faster? What material failed? Document it and adjust your SOW template before the next project. The investors I respect most treat each renovation as a data point, not a one-time event.
— G
Floor2you can help you get your rental renovation right
Choosing the right flooring for a rental is one of the highest-leverage decisions in the entire remodeling process. The wrong product costs you in maintenance calls, early replacement, and tenant complaints. The right product runs quietly for a decade.

Floor2you specializes in rental-grade flooring installation across South Florida, with direct experience in the materials and specs that hold up to real tenant use. From luxury vinyl plank to tile and hardwood, the team handles full installation with the speed and reliability that landlords and property managers need between tenants. If you are ready to get your unit tenant-ready, request a quote and get a fast response from a team that understands income property timelines.
FAQ
What is a tenant-ready renovation?
A tenant-ready renovation is a targeted set of upgrades that make a rental unit safe, clean, and appealing enough to attract and retain quality tenants. It covers safety compliance, fresh paint, functional fixtures, and clean flooring rather than luxury finishes.
How much should I budget for a rental property renovation?
Budget based on contractor bids for each trade, then add 15–20% as a contingency fund to cover unexpected issues like outdated wiring or plumbing. Permit fees typically add $200–$2,000 depending on your municipality.
Which renovations give the best ROI for a rental property?
Fresh paint, updated hardware, and LVP flooring consistently deliver the best return because they are low cost, high visual impact, and durable under tenant use. Kitchen and bathroom refreshes rank next, provided the total cost breaks even within 24 months.
Do I need permits to renovate a rental property?
Yes. Permits are legally required for most structural, electrical, and plumbing work in a rental property. Unpermitted work can void your insurance and trigger fines, so file permit applications before any trade work begins.
How long does a typical rental renovation take?
A standard single-unit rental renovation runs 2–6 weeks depending on scope, permit turnaround, and contractor availability. Safety and structural work, followed by trades, then cosmetic finishes is the correct sequence to avoid rework.